
How to Splint a Broken Bone: First Aid for Fractures and Sprains (2026)
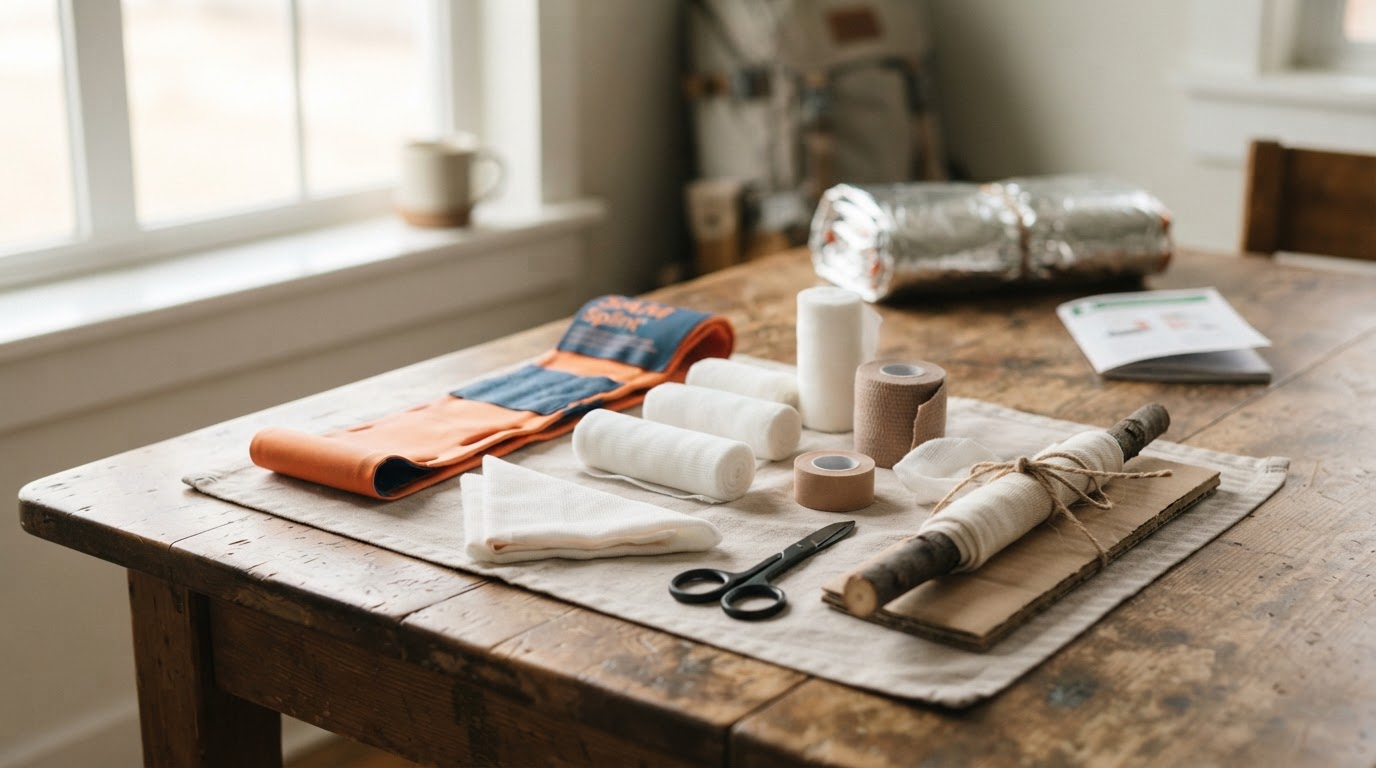
Learn how to splint a broken bone and care for sprains step by step: the technique, improvised splints, red flags that need an ER, and kit picks for 2026.
This article contains affiliate links. If you buy through these links, we may earn a small commission at no extra cost to you.
If a limb is bent wrong, swollen, or can't bear weight, the move is simple: splint the joint above and the joint below the injury, pad it, and secure it in the position you found it. Do not try to straighten it. That paragraph is most of the skill. This guide covers the full technique, what to use when all you have is a magazine, and the red flags that mean skip the splint and head for an ER.
Before You Splint: Rule Out What You Can't
A splint immobilizes a broken limb. It does not help everything, and the wrong call makes a serious injury worse. Get help first if:
- The injury is to the neck, spine, or head after a fall or crash. Hold the head still and wait for EMS.
- There's severe bleeding with the break. Control the bleeding first; that's the moment for our how to stop severe bleeding guide.
- The limb is numb, pale, or blue, or you can't find a pulse below the injury. That's the bone pressing on blood vessels; it needs an ER now.
- A bone is sticking through the skin (an open fracture). Do not push it back in. Cover it loosely with a clean dressing, splint around it, and get to a hospital.
For everything else, a well-padded splint done calmly beats rushing and jostling a fracture.
How to Splint, Step by Step
The technique works for arms, legs, wrists, ankles, and fingers. Give yourself about five minutes and work through it in order.
- Assess. Look for deformity, swelling, or a limb that lies at an odd angle. Check that the skin below the injury is warm and pink before you start.
- Use the position of comfort. Do not straighten a bent limb. If it already sits at an angle, splint it at that angle.
- Pad the splint. Rigid material goes against padding, never bare skin. A folded towel, a sweatshirt, or a pillow taped around a board spreads the pressure.
- Span the joint above and below the injury. For a forearm break, the splint runs from above the elbow to below the wrist. For a lower leg, from above the knee to below the ankle.
- Secure it snugly, not tightly. Wrap bandages, cloth strips, tape, or a belt around the splint. Two fingers should slip between the wrap and the skin.
- Re-check circulation. Every 15 to 20 minutes, press a fingernail or toenail and watch the color return. If the skin below turns pale, blue, or cold, loosen the wrap. Swelling means a tight splint gets tighter on its own.
A cold pack on the injury, 20 minutes on and 20 off, eases the swelling while you wait. Single-use instant packs like MED PRIDE Disposable Instant Cold Packs, 5x6 in… work straight from the kit: squeeze, shake, apply, no freezer involved. Keep the limb elevated if you can.
Sprain or Break? Use the Ankle Rules
You don't need an X-ray for every twist, and a bad sprain can hurt as much as a fracture. The Ottawa Ankle Rules are the checklist ERs use to decide who actually needs imaging. An ankle can usually be treated at home if, 48 hours after the injury, the person can take four steps and there's no tenderness over the two ankle bones or the base of the fifth toe. If any of that fails, treat it as a fracture and splint it.
For a sprain you're confident about, use RICE: rest, ice 20 minutes on and 20 off, compression with an elastic wrap, and elevation. Compression is the step people skip. A 4-inch elastic wrap like the ACE 4 Inch Elastic Bandage with Clips, Beige (about $9) holds the swelling down and supports the joint while it heals: wrap from the toes or fingers upward, snug enough to support, loose enough that a finger slides under the edge.
What to Use When You Have Nothing
You rarely need a purpose-built splint. Around a home, car, or trail, something rigid is almost always nearby:
- A rolled magazine, a board, a trekking pole, an umbrella, or a shovel handle for arms and legs.
- A second body part for fingers: tape the injured finger to its neighbor, called buddy splinting.
- Cloth strips, belts, tape, or bandages to secure it.
The one worth carrying anyway: the SAM Splint 36 Inch, Orange & Blue, Moldable… weighs about 4 ounces. Bend the aluminum-and-foam core around the limb, mold it to the angle you found, and it keeps the shape without a helper holding it rigid. The improvised list works; this replaces the hunt for a board on a trail.
The hardest part is holding the limb still while you work. Have the injured person support it if they can, or someone else holds while you pad and wrap.
The Kit That Earns Its Spot
No first aid kit ships a rigid splint worth carrying, and that's fine. The kit's job here is padding, bandage material, and a manual that keeps the steps straight when you're rattled. Add one roll of your own: a 4-inch elastic bandage like the ACE 4 Inch Elastic Bandage with Clips, Beige handles the compression step for a sprain and doubles as the wrap that holds a padded splint in place. That's how we treat the four below.
| Kit | Price | What it adds for a bone/joint injury |
|---|---|---|
| First Aid Only 298-Piece All-Purpose Kit | ~$16 | Wraps and bandages to pad and secure a splint; cheap enough to keep one in the house and one in the trunk |
| SurviveX Large First Aid Kit | ~$103 | Waterproof, color-coded compartments, so you grab padding fast with one hand while the other holds a limb still |
| Adventure Medical Kits Mountain Series Hiker… | ~$34 | The manual teaches the splint steps; the daypack pick for a fall on the trail |
| MyMedic MyFAK Pro First Aid Kit | ~$264 | Trauma gear, not an ankle kit: tourniquet and chest seals for the crash scene, where bleeding control comes first |
If someone is badly hurt at a crash or a fall, the trauma gear in the MyMedic MyFAK Pro First Aid Kit is the right first grab. For a twisted ankle or a suspect break on the trail, any of the other three plus a stiff branch does the job.
What NOT to Do
- Don't straighten a bent bone. Splint it as it lies.
- Don't push a protruding bone back in. Cover it, splint around it, get help.
- Don't wrap so tight you lose a pulse. Two fingers should slip under; re-check circulation every 15 to 20 minutes.
- Don't remove a shoe if the foot is swelling. It will swell more once the shoe is off, and the shoe gives you splinting support.
- Don't let a groggy or unsteady person move the limb on their own, and skip food and water in case surgery is needed.
Splinting is a two-person job when you can make it one: someone holds, someone wraps, and nobody rushes. For bleeding, burns, and kit options keep our emergency wound care guide, burn first aid guide, and best first aid kits roundup bookmarked.